7. 安排工作流计划#
在工作流的这一步中,您将学习如何使用计划触发器节点安排您的工作流,使其在设定的时间/间隔自动运行。在这一步骤之后,您的工作流应该如下所示:
您到目前为止构建的工作流只有在您点击执行工作流时才会执行。但Nathan需要它在每周一早上自动运行。您可以使用计划触发器来实现这一点,它允许您安排工作流在固定的日期、时间或间隔定期运行。
为了实现这一点,我们将移除最初的手动触发器节点,并用计划触发器节点来替换它。
移除手动触发器节点#
首先,让我们移除手动触发器节点:
- 选择连接到您的HTTP请求节点的手动触发器节点。
- 选择垃圾桶图标进行删除。
这将移除手动触发器节点,您将看到“添加第一步”选项。
添加计划触发器节点#
- 打开节点面板并搜索计划触发器。
- 当它在搜索结果中出现时选择它。
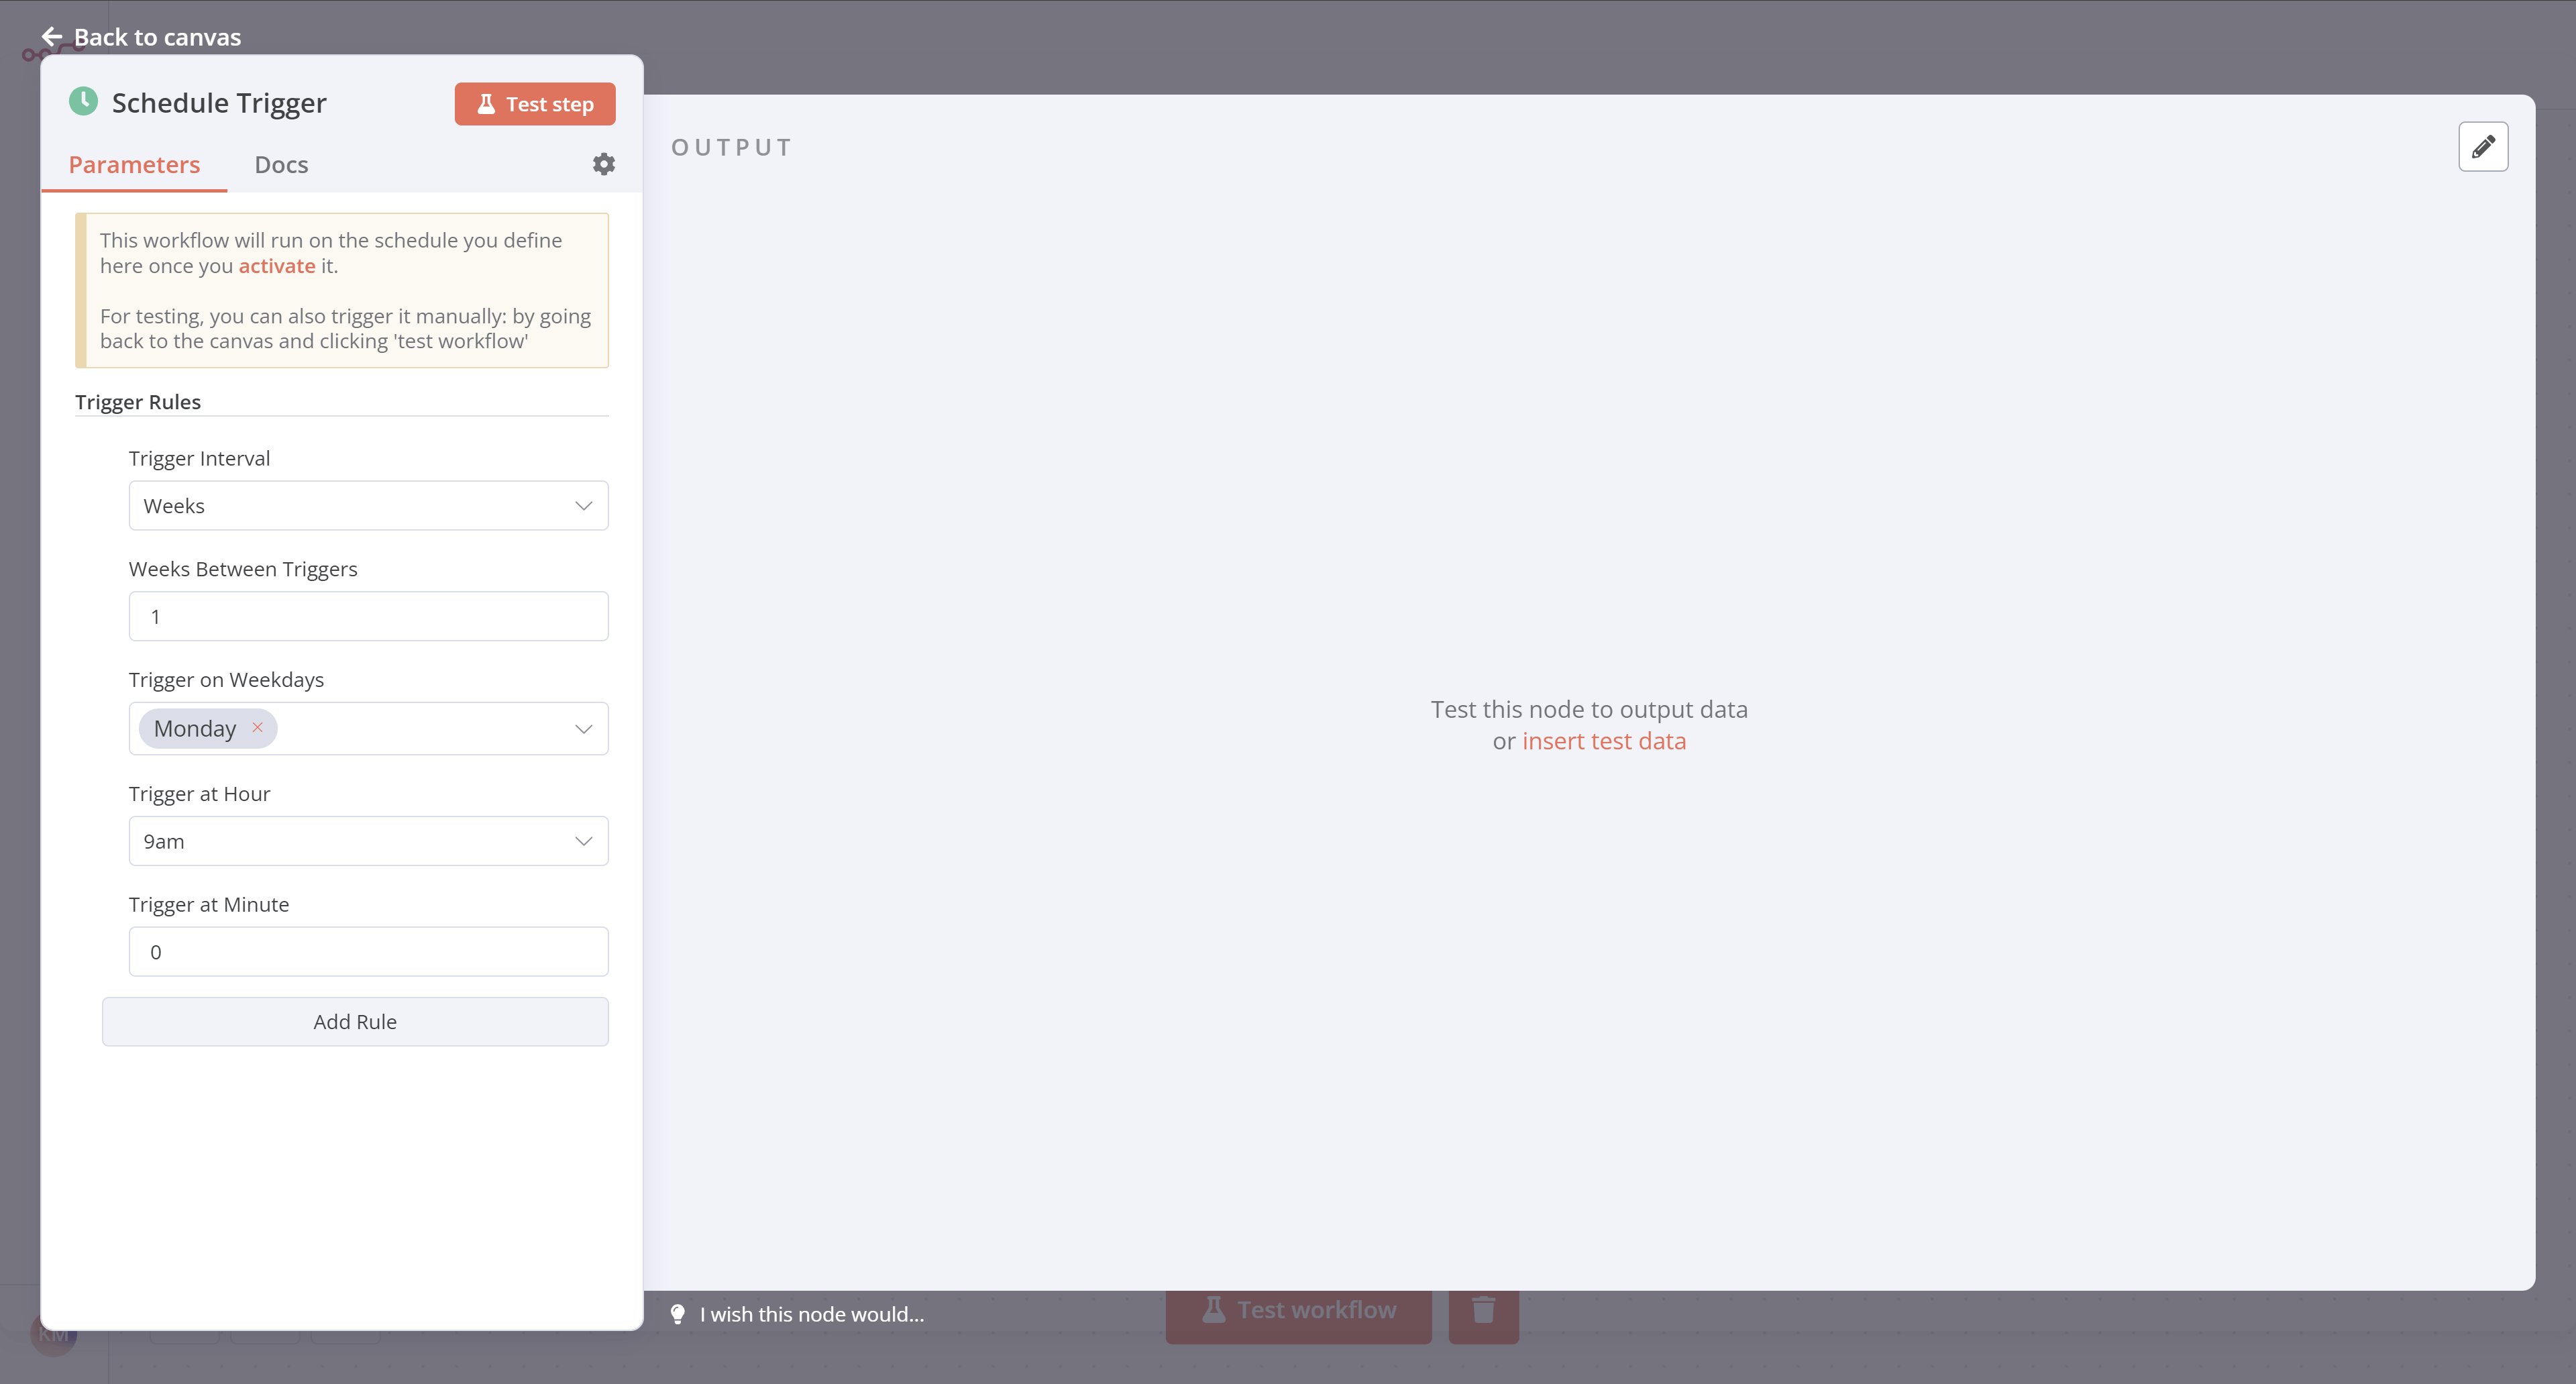
In the Schedule Trigger node window, configure these parameters:
- Trigger Interval: Select Weeks.
- Weeks Between Triggers: Enter
1. - Trigger on weekdays: Select Monday (and remove Sunday if added by default).
- Trigger at Hour: Select 9am.
- Trigger at Minute: Enter
0.
Your Schedule Trigger node should look like this:
Keep in mind
To ensure accurate scheduling with the Schedule Trigger node, be sure to set the correct timezone for your n8n instance or the workflow's settings. The Schedule Trigger node will use the workflow's timezone if it's set; it will fall back to the n8n instance's timezone if it's not.
Connect the Schedule Trigger node#
Return to the canvas and connect your Schedule Trigger node to the HTTP Request node by dragging the arrow from it to the HTTP Request node.
Your full workflow should look like this:
What's next?#
You 👩🔧: That was it for the workflow! I've added and configured all necessary nodes. Now every time you click on Execute workflow, n8n will execute all the nodes: getting, filtering, calculating, and transferring the sales data.
Nathan 🙋: This is just what I needed! My workflow will run automatically every Monday morning, correct?
You 👩🔧: Not so fast. To do that, you need to activate your workflow. I'll do this in the next step and show you how to interpret the execution log.
🚀 与作者交流

📚 教程 💡 案例 🔧 技巧

⚡ 快答 🎯 定制 🚀 支持